Disponibilidade de recurso
O Controle de Agentes para cluster do Kubernetes está em disponibilidade geral (GA). O suporte para gerenciamento de agentes em hosts está atualmente em versão prévia pública.
Para obter uma lista completa de agentes suportados e seus ambientes, consulte nossa documentação de compatibilidade de tipos de agentes.
O recurso de visualização pública é fornecido de acordo com nossas políticas de pré-lançamento.
Este guia fornece o caminho mais rápido para começar a usar o Controle de Agentes. Nós o guiaremos pelo fluxo de trabalho essencial do "caminho feliz" para criar sua primeira frota e executar uma implantação básica.
Visão geral do fluxo de trabalho
O processo de configuração do Controle de Agentes tem uma ordem específica. Você deve criar uma frota antes de instalar o Agente Control, porque o processo de instalação requer uma frota para associar. Depois que o agente Control é instalado, a entidade é automaticamente atribuída àquela frota. Portanto, o fluxo de trabalho é:
- Crie uma frota na plataforma New Relic.
- Instale o agente Control na sua entidade. O assistente de instalação usa os detalhes da sua frota para atribuir cada entidade, tornando-a uma "Entidade gerenciada atribuída".
- Execute uma implantação para instalar e configurar agentes nas entidades que agora fazem parte da sua frota.
Pré-requisitos
Você precisará da função de Organization Manager ou de uma função personalizada com permissões equivalentes de gerenciamento de frota para executar essas ações.
Etapa 1: Crie sua primeira frota
O primeiro passo é criar uma frota. No Controle de Agentes, uma frota é uma coleção homogênea de entidades gerenciadas (como cluster do Kubernetes) que compartilham configuração de instrumentação idêntica. As frotas atuam como agrupamentos lógicos, permitindo que você gerencie versões de agentes e configurações de forma consistente em todo o seu ambiente em escala, evitando desvios de configuração e lacunas de observabilidade.
Entre na plataforma New Relic com a conta apropriada.
Navegue até All capabilities → New Relic Control.
- Dica: você pode fixar o New Relic Control na barra de navegação à esquerda para facilitar o acesso clicando no ícone de fixação.
No menu New Relic Control, selecione Fleets na seção Fleet Control.
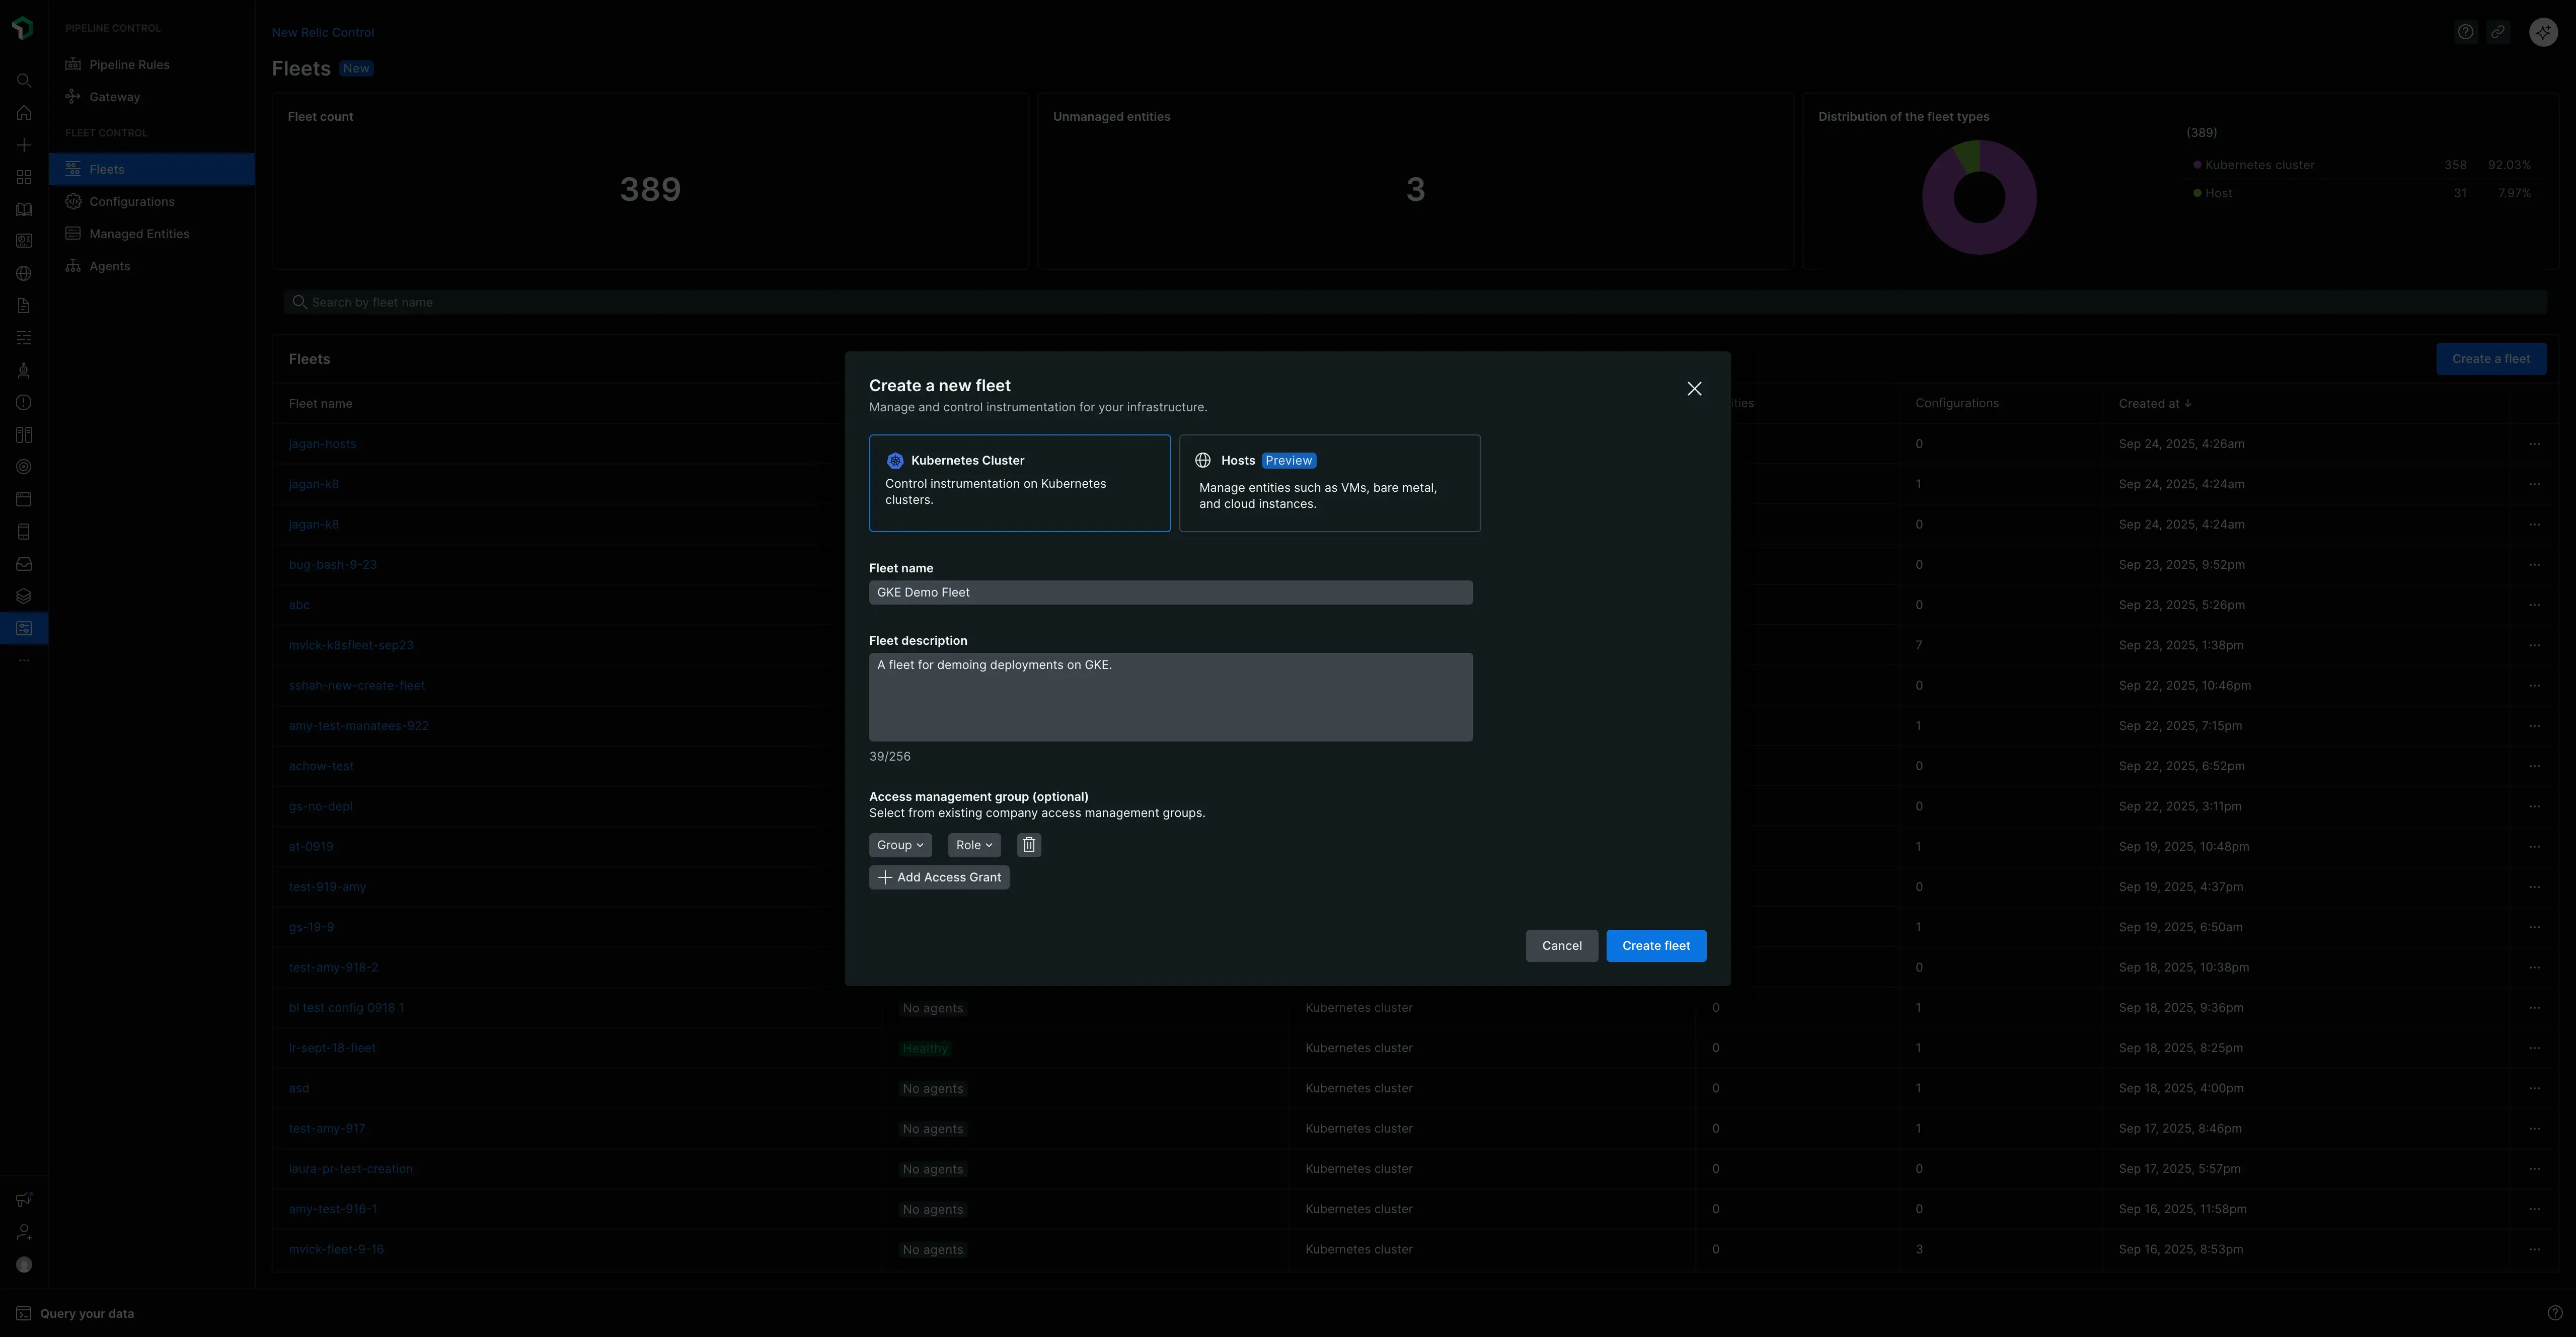
Na página principal Frotas, clique no botão Create a fleet.
No modal:
- Dê à sua frota um Name significativo (por exemplo,
prod-us-east-1-platform-k8s) e uma Description opcional. - Selecione o Type of Fleet. Para este guia, selecionaremos o Kubernetes, que está geralmente disponível. O suporte ao host está atualmente em versão prévia pública.
- Deixe o Access management como padrão. Esta é uma configuração opcional para FGA (controle de acesso refinado).
- Dê à sua frota um Name significativo (por exemplo,
Clique em Create Fleet.

Com a frota criada, você agora tem o componente necessário para prosseguir com a instalação do Agente Control.
Etapa 2: instalar o controle do agente
Agora que sua frota existe, instale o agente Control na entidade que você deseja associar a ela.
Siga as instruções na documentação de configuração do agente Control. O assistente fornece um arquivo values.yaml e um comando Helm que instala o agente Control e atribui a entidade gerenciada à frota que você acabou de criar. Após a conclusão, sua entidade aparecerá como Assigned Managed Entities dentro da sua frota.
Etapa 3: Criar uma configuração de agente
Antes de implantar o agente da New Relic Infrastructure, você precisa criar uma configuração para ele. Qualquer configuração que você criar será salva globalmente e ficará disponível para uso em sua conta New Relic.
No menu esquerdo New Relic Control, clique em Configurations.
Clique no botão Create configuration.
No modal:
- Para Environnement, selecione Kubernetes.
- Para Agent type, selecione New Relic Infrastructure.
- Dê à configuração um nome significativo e exclusivo. Como as configurações são globais, é importante ter um nome claro. Por exemplo:
New Relic default infra config.
Clique em Continue.
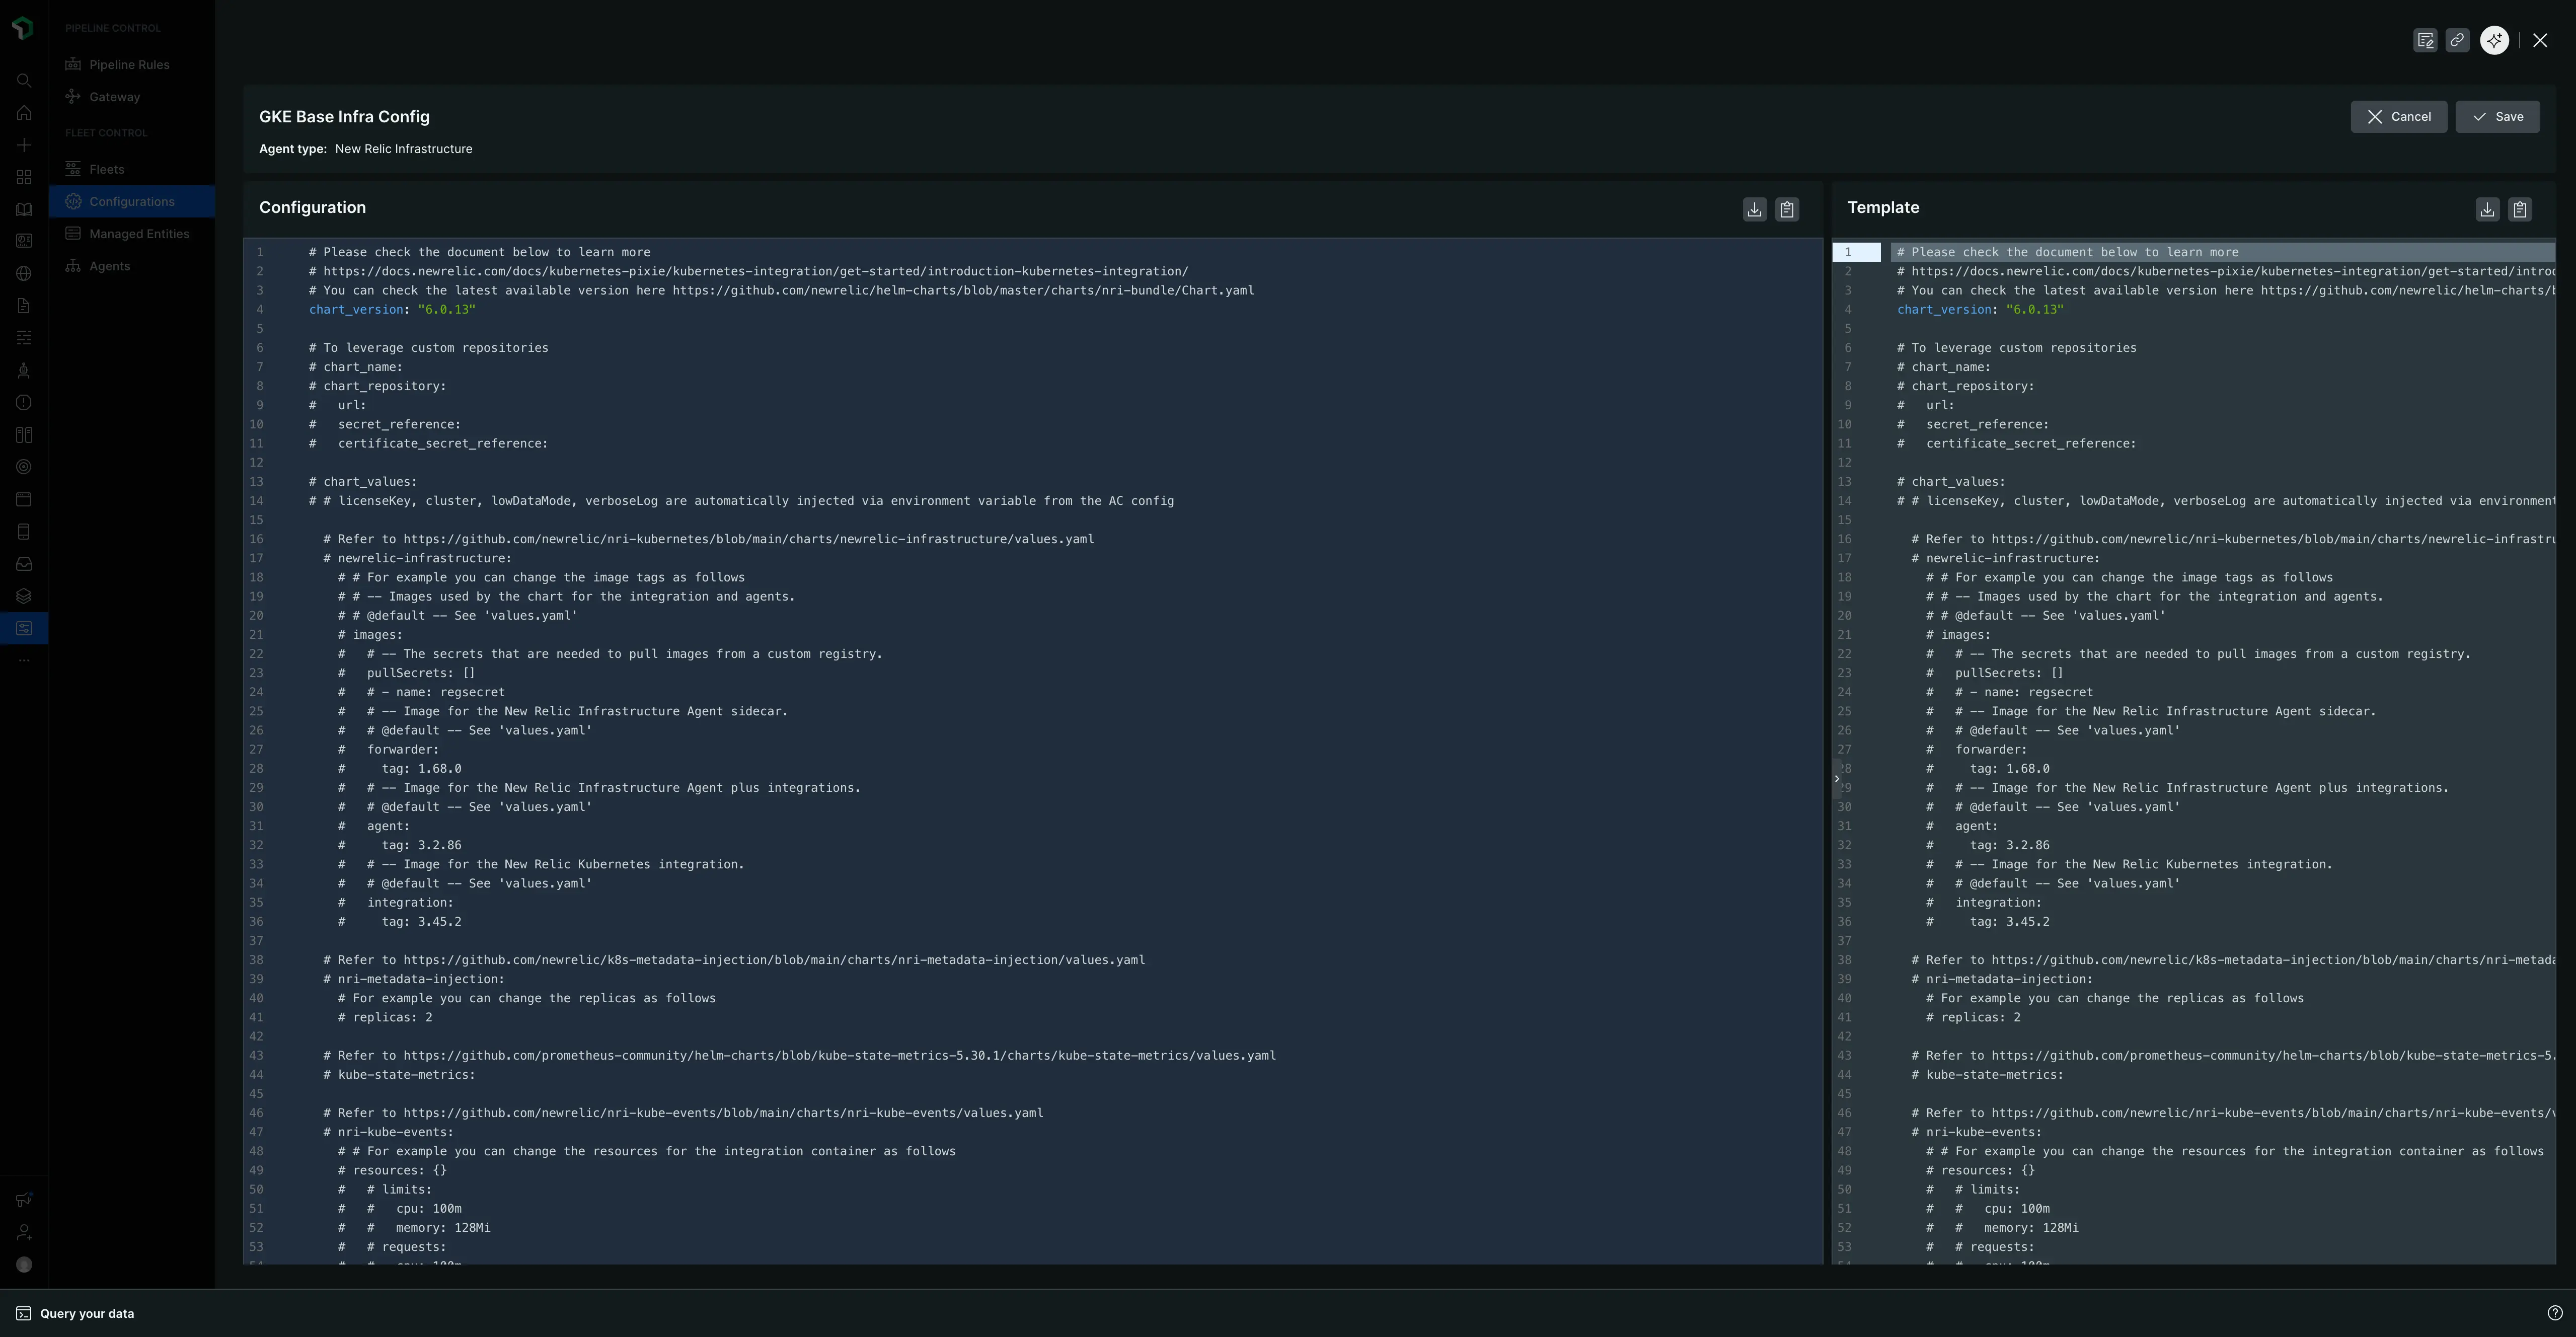
Você verá dois painéis. O painel direito contém um modelo padrão. Clique no botão Copy para copiar o modelo inteiro.
Cole o texto copiado no painel de configuração esquerdo.
Clique em Save. Sua configuração agora está salva globalmente.

Etapa 4: crie e execute sua primeira implantação
Uma implantação é um conjunto controlado de ações que podem instalar, excluir ou configurar um agente na entidade gerenciada em sua frota. Agora você criará um para implantar o agente New Relic Infrastructure.
- Volte para a aba Fleets e selecione a frota que você criou anteriormente.
- Na página de resumo da frota, clique em Create a deployment. (Caso a frota possua implantação existente, acesse a aba Deployments e clique em Create deployment).
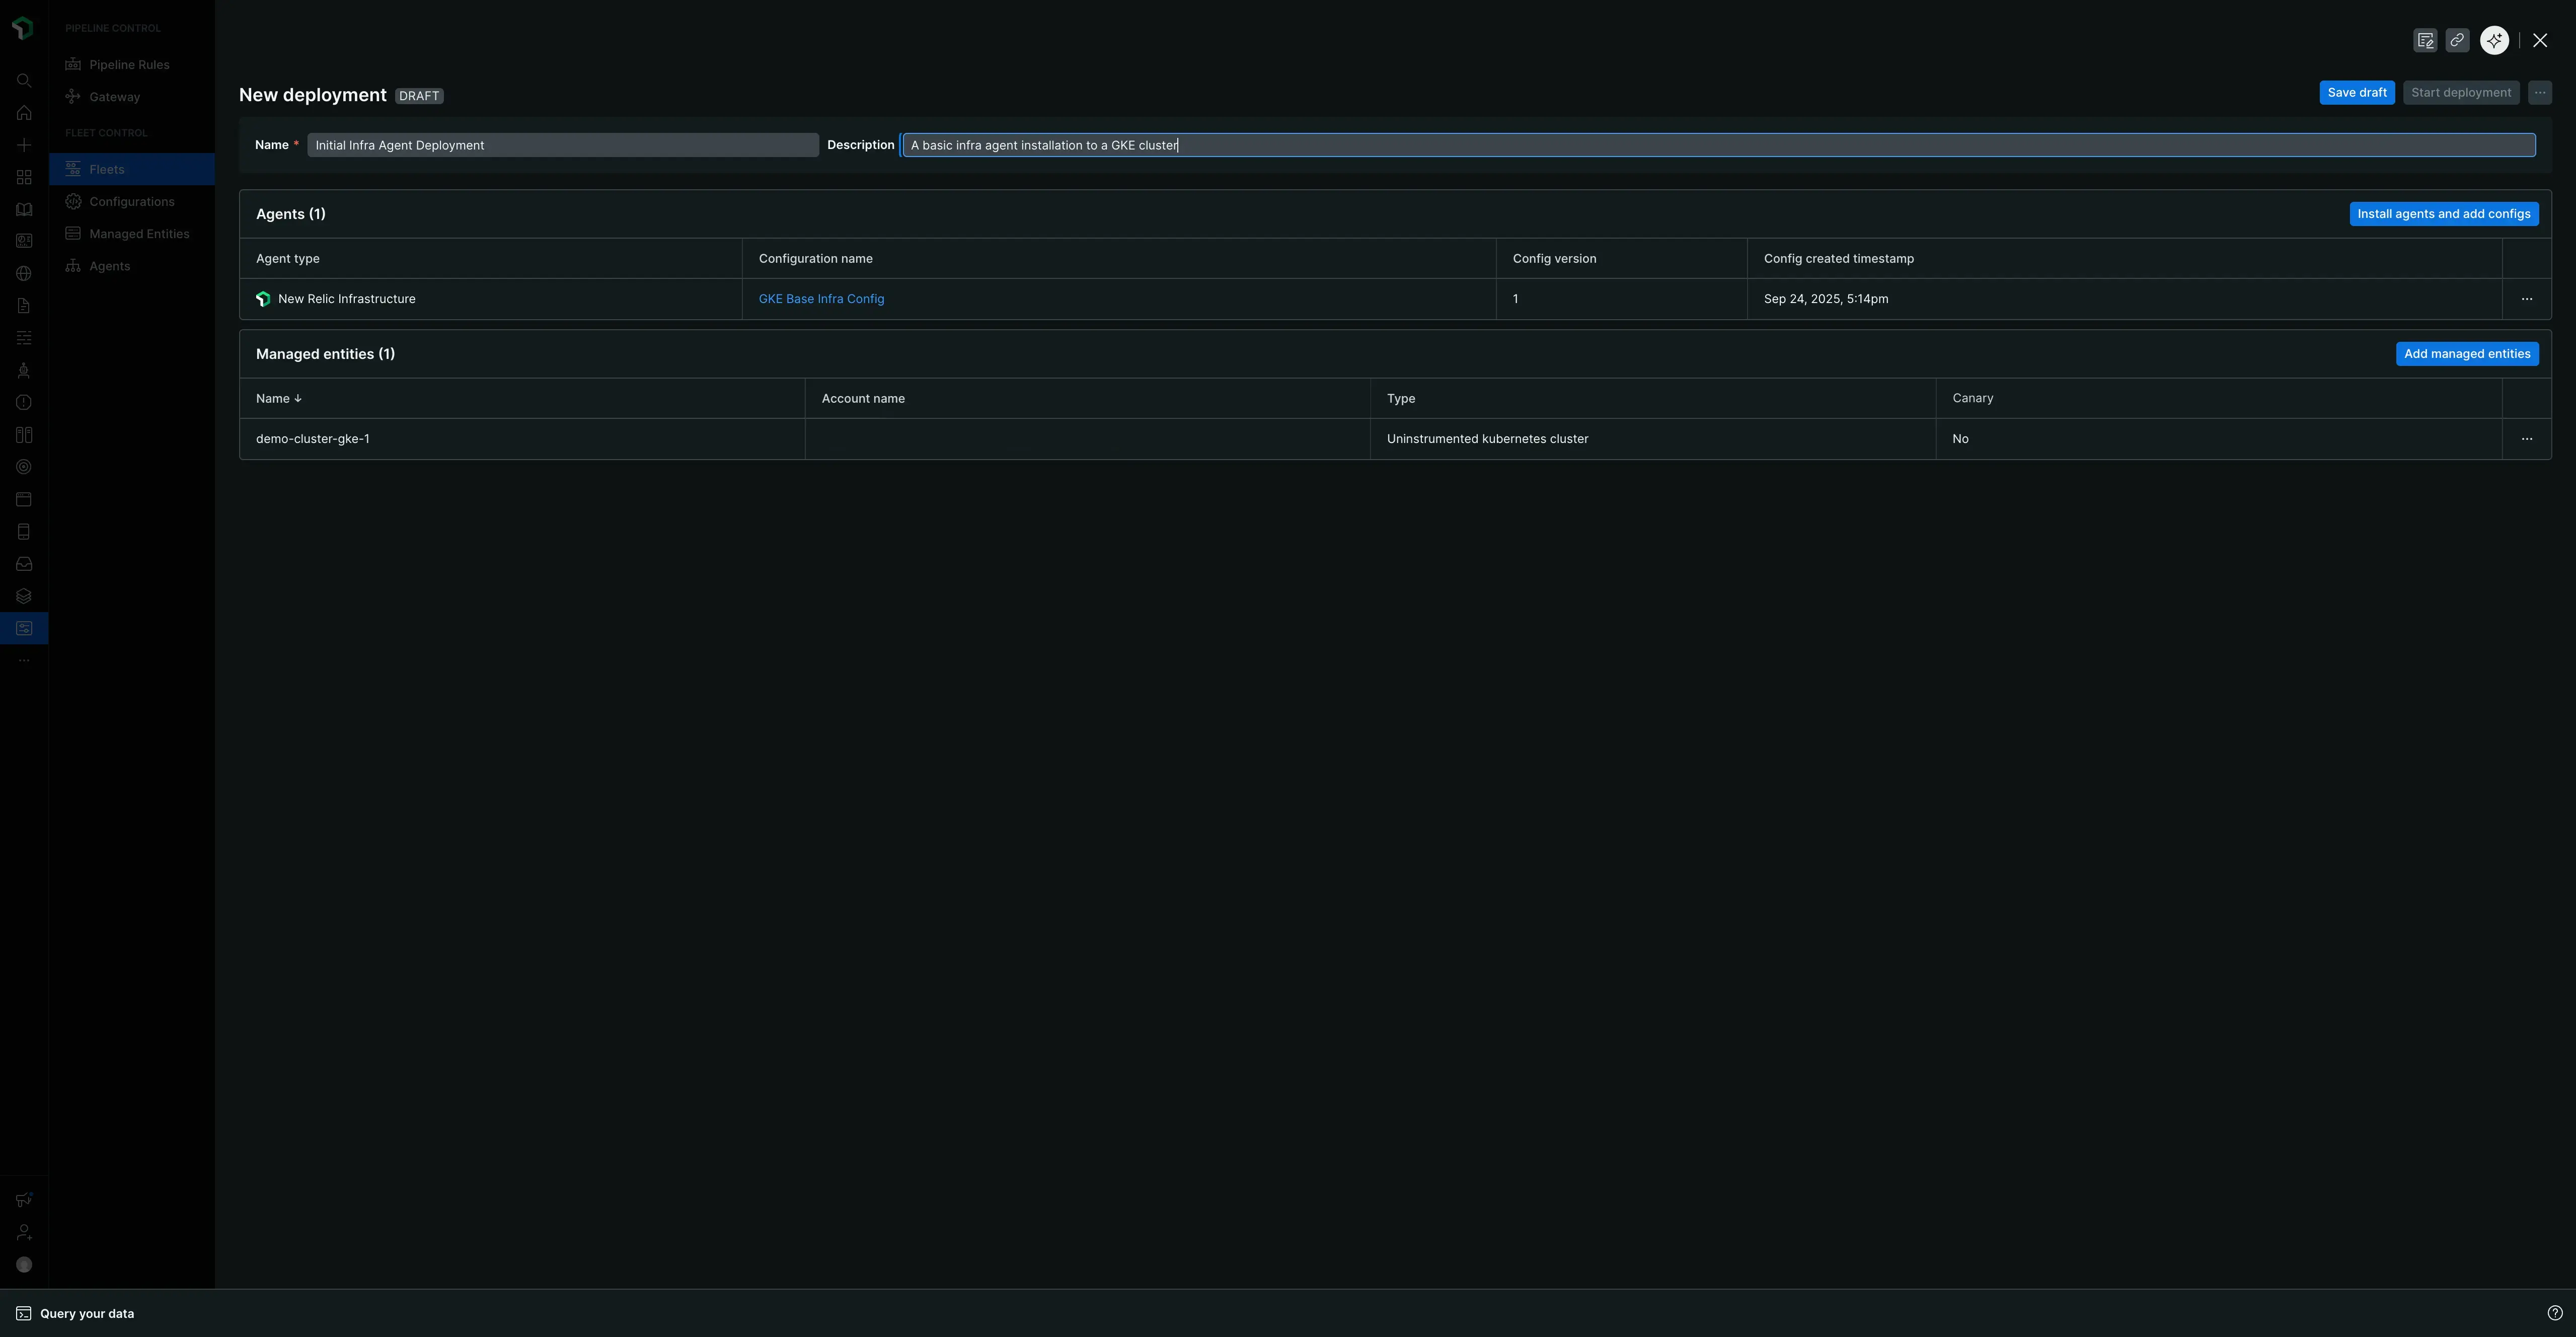
- Dê à sua implantação um Name obrigatório. Um nome significativo fornece contexto histórico e ajuda na resolução de problemas. Considere um padrão que inclui a alteração, uma versão ou um ID ticket. Por exemplo:
v1.0-initial-infra-deployouadd-logging-JIRA-123. - Clique em Add an agent.
- Selecione o tipo de agente para o qual você criou a configuração: New Relic Infrastructure.
- Na lista de configurações disponíveis, selecione o
New Relic default infra configque você acabou de criar. A versão padrão seráv1. - Clique em Add to deployment. O agente e sua configuração associada agora aparecerão em uma tabela chamada Agents.
- Clique em Save draft.
- Quando estiver pronto, clique em Start deployment. Um modal de confirmação aparecerá.
- No modal, clique em Start deployment para lançamento.

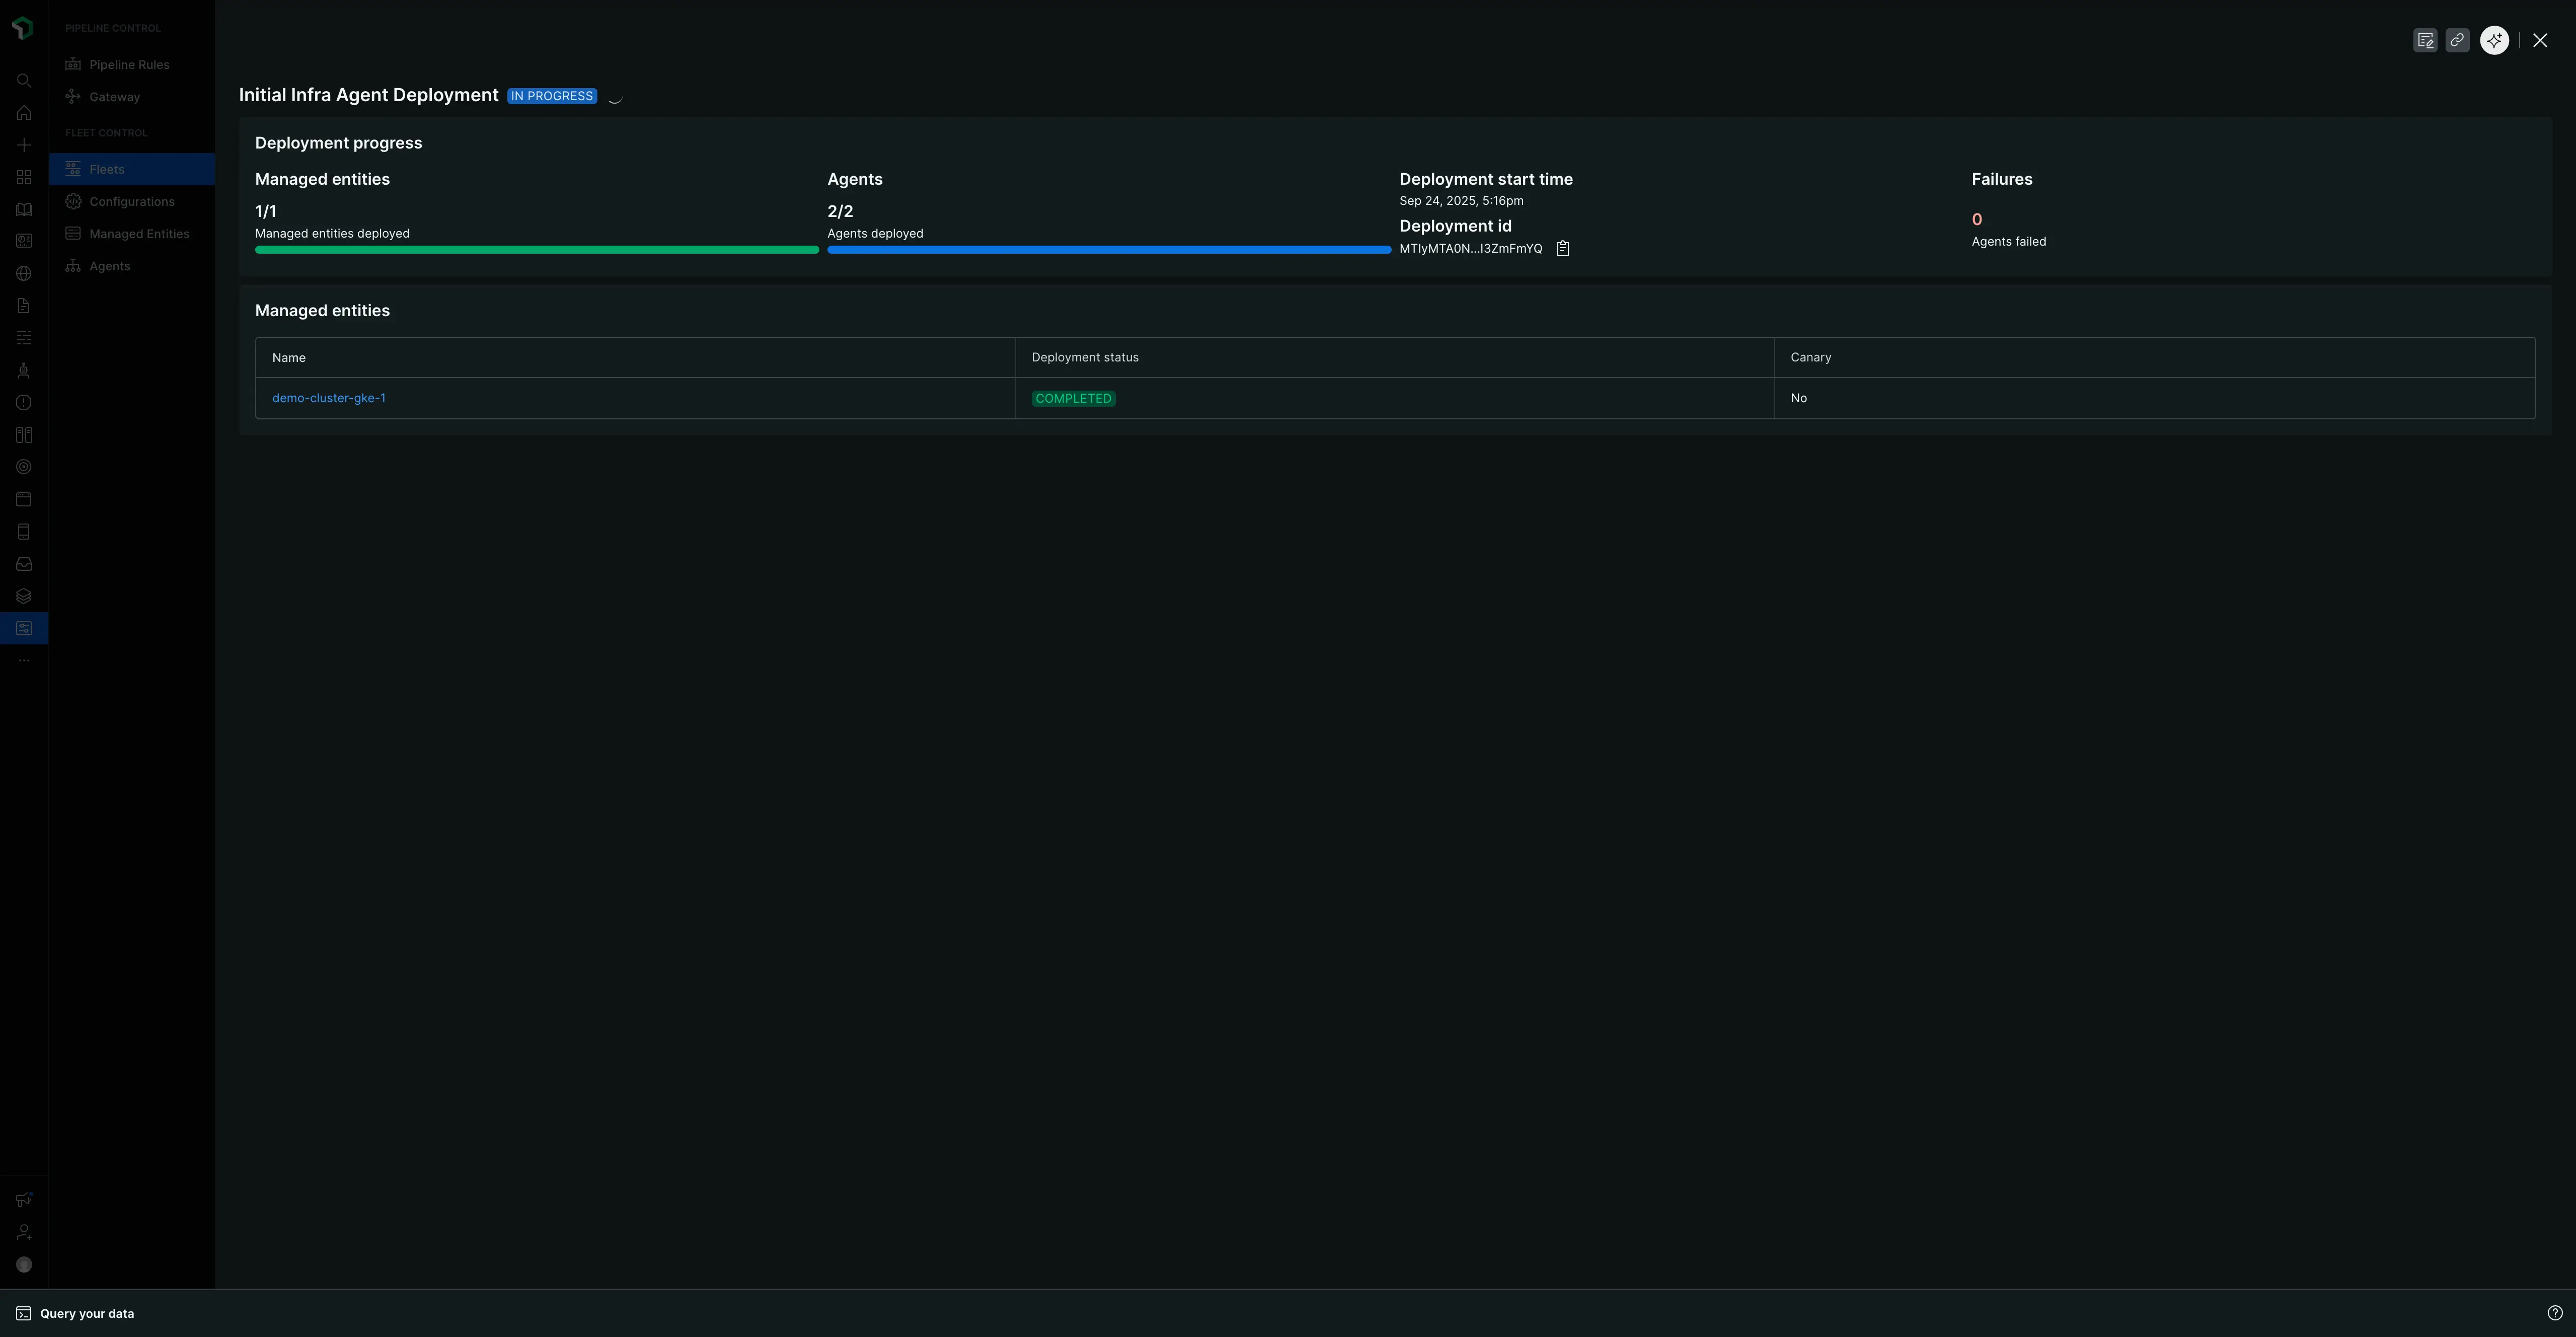
Uma tela "EM ANDAMENTO" mostrará o status, o número de entidades gerenciadas e agentes afetados, além de um ID de implantação. Quando concluída, a página será atualizada com o status "Concluído" e tabelas de resumo detalhando a implantação, o agente e a entidade gerenciada específica que foram instrumentados.

Próximos passos
Parabéns por implantar sua primeira frota! Você aprendeu o fluxo de trabalho principal para gerenciar sua instrumentação em escala.
Para desenvolver o que você aprendeu, explore nossa página sobre Gerenciamento de frotas. Ele fornece detalhes adicionais sobre o recurso mais detalhado e cotidiano do Controle de Agentes, incluindo como:
- Crie e versione seu agente de configuração.
- Gerencie os detalhes e configurações da sua frota.
- Use a guia Managed Entities de nível superior para ver toda a sua infraestrutura com o Agente Control instalado, incluindo entidades atribuídas e não atribuídas.
- Mergulhe em uma frota específica para visualizar a configuração efetiva em sua aba de Agents e entender os diferentes status de implantação e instrumentação.