In the cloud, it's important to look regularly and closely at how your applications and services are architected and utilized. It's the best way to identify opportunities that will let you right-size your instances, fine tune your databases, modify your storage usage, better configure your load balancers, or even re-architect your applications.
For example, if you have a set of 20 instances all running at 10% CPU usage, you might consider using smaller instances or consolidating more work onto those instances. This kind of thinking about your cloud utilization and spend will help you optimize your environment and save money quickly.
Optimizing your cloud architecture has three main goals:
- Improve performance, availability, and end-user experience by taking better advantage of cloud services
- Optimize your cloud spend, striking the delicate balance between cost and performance
- Capture business and technical metrics that help justify your current cloud spend that can be referenced as justification for a larger cloud budget as growth dictates
In this tutorial, we'll show you how to use the New Relic platform to capture all the data you should leverage to optimize your cloud architecture and spend.
1. Instrument your application and cloud environment
Make sure the following products and integrations are instrumented:
Instrument | Details |
|---|---|
Instrument infrastructure: If you haven't already done so, review the requirements for the infrastructure agent. Infrastructure comes with several types of integrations, including Amazon Web Services (AWS), Microsoft Azure, and on-host integrations. After you've installed the infrastructure agent on your host(s), you'll immediately have access to the broad spectrum of metrics the agent collects out-of-the-box. | |
Instrument your applications with APM. Doing so will let you monitor how your applications are performing while you are optimizing the underlying cloud services. That way, you can confirm that your changes to the infrastructure are in fact improving application performance. | |
Infrastructure's Amazon integrations let you monitor your AWS data everywhere in our platform, including infrastructure, dashboards, and alerts. | |
If you are hosted in an AWS environment, New Relic can help you monitor your cloud spend with our AWS Billing integration. To leverage New Relic's AWS Billing integration, follow the procedures in the Connect AWS Billing documentation |
2. Create dashboards to display anomaly infrastructure metrics; include AWS budgets if available
Dashboards lets you write powerful custom queries about your data and visualize the results in widgets displayed on a common dashboard. You can also feed the results of your queries directly into alerts, where you can get immediate notifications on any deviation identified.
For this step, you should display anomaly infrastructure metrics related to performance and usage (CPU, memory, disk, database, etc.). Include AWS Budgets if available.
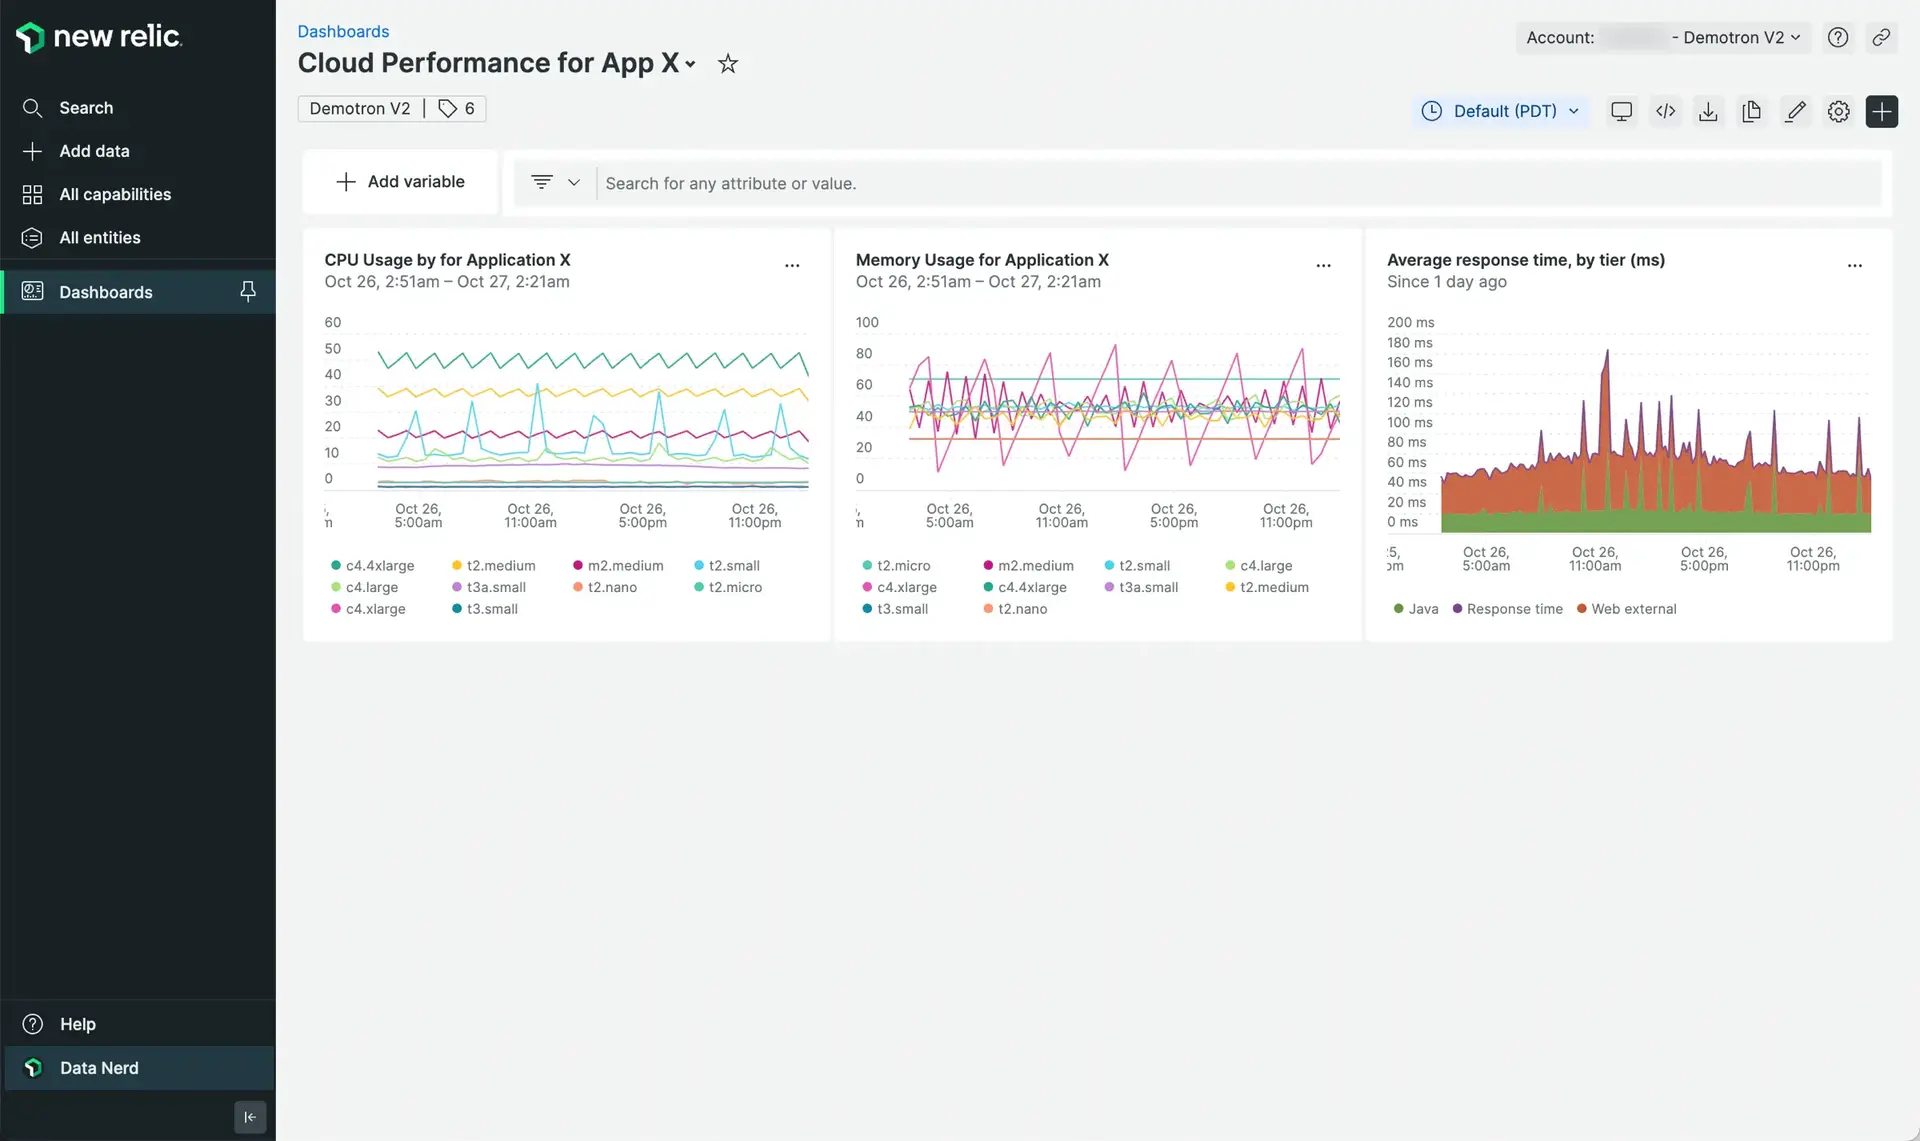
Create individual for each application, and then collect those dashboards into a single data app, as shown here. This AWS Production Overview data app displays a set of widgets relevant to an AWS production budget. Data apps are great for presentations where you want to step through a series of topics and also provide a clear overview of an entire environment or service.
3. Identify resources for optimization
This step shows you how to use the metrics New Relic has captured to determine which resources to optimize.

In the sample dashboard above, the CPU-usage widget on the left reveals that this application uses many instances sizes. Note that the “c4.xlarge” instance (in coral) consistently consumes only around 20% CPU capacity. However, when you analyze the c4.xlarge Memory usage in the center widget (light green), you'll see that memory usage for this instance ranges from 20% to 80%. This suggests that the application is more memory-intensive than CPU-intensive. In this case, the instance type should be changed from a compute-optimized instance to one that is memory-optimized. Note that the chart on the right of the dashboard can be used to monitor the application's average response time as you make these optimizations.
This is just one example of how to identify cloud-based resources that could be candidates for optimization.
Now that you've identified architecture for optimization, go ahead and do so. Whether you right-size your instances, fine tune your databases, modify your storage usage, better configure your load balancers, or even re-architect your applications, in the end your goal is to be able to compare your new, optimized architecture against the anomaly you captured in Step 2. For more about anomalies please review the Establish Objectives & Anomaly tutorial.
4. Optional: Set up alerts
You can create an alert condition for NRQL queries. Be sure to reference the complete documentation as needed.
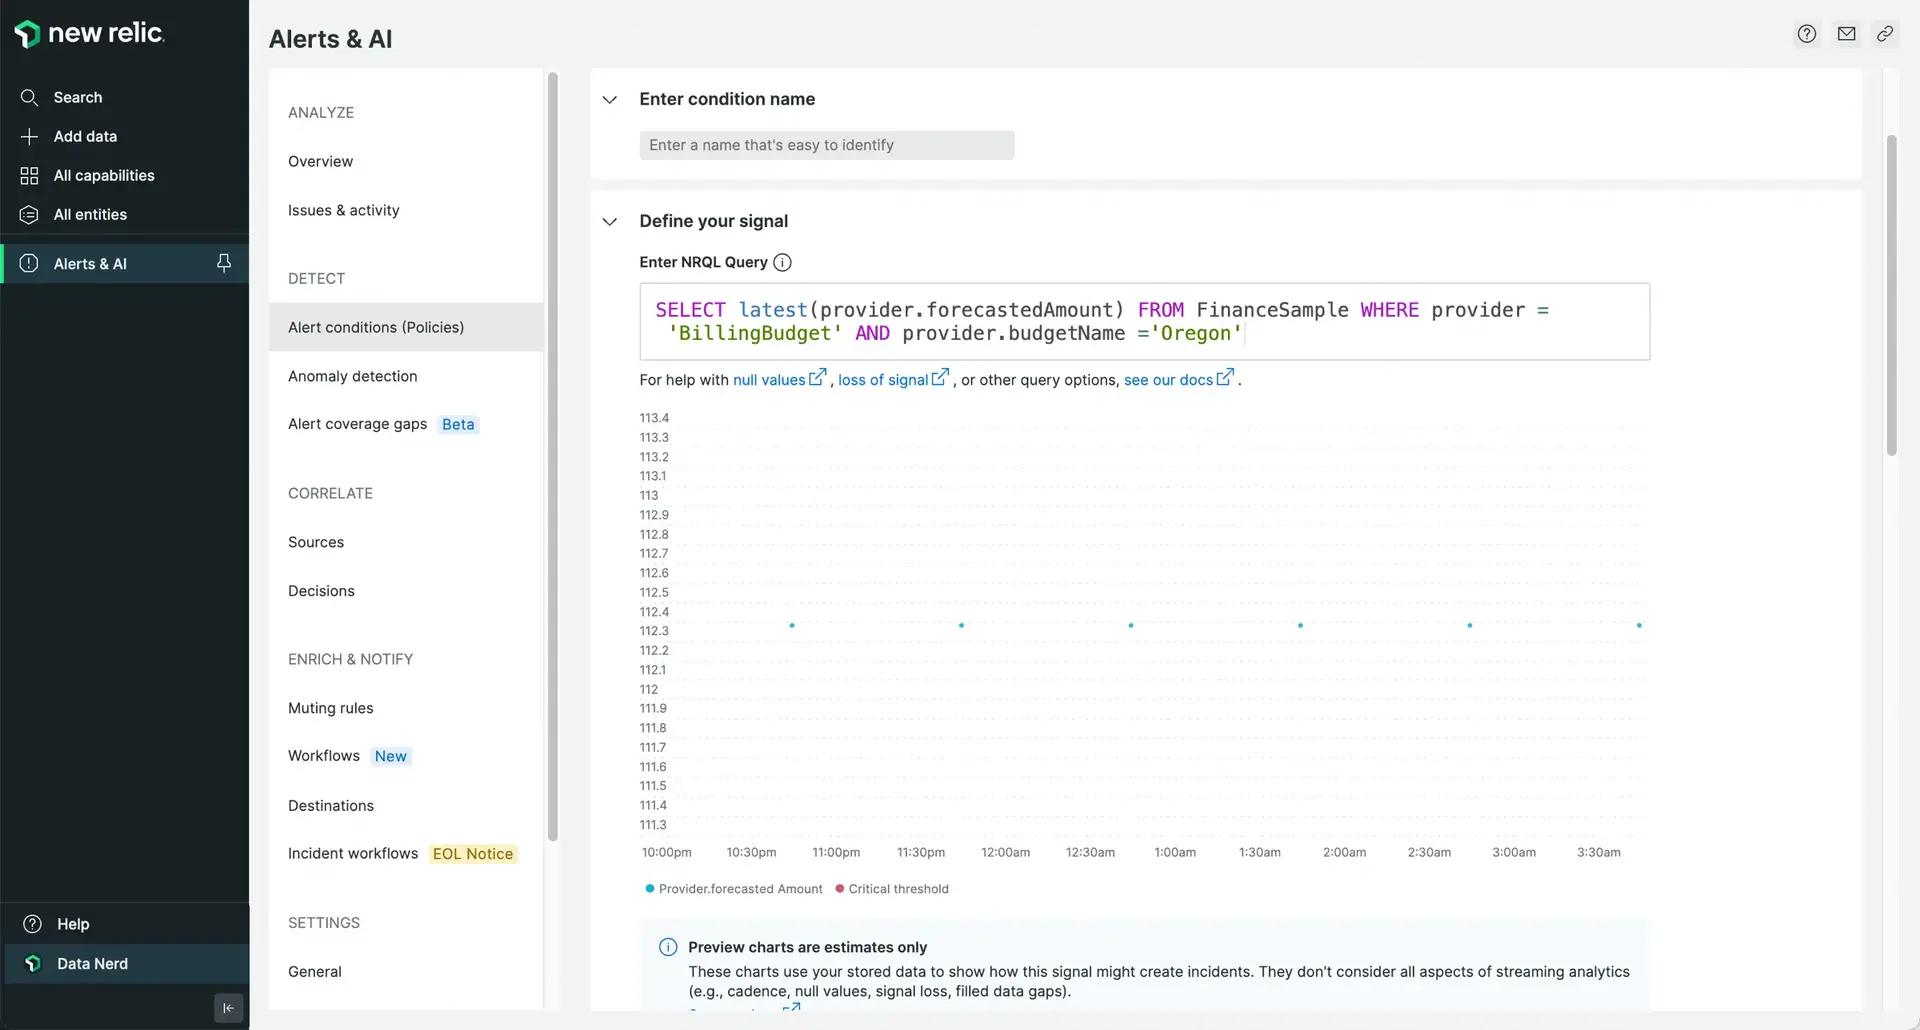
Use this query to set up alerts:
SELECT latest(`provider.actualAmount`) AS '$ Actual', latest(`provider.forecastedAmount`) AS '$ Forecast', max(`provider.limitAmount`) AS '$ Limit' FROM FinanceSample WHERE provider = 'BillingBudget' AND `provider.budgetName` = '[Your Cloud Budget]'If you can write queries on your data and show them in dashboards, then you can easily use them to generate alert conditions.
Anomaly queries
New Relic also lets you write “anomaly queries” against your data. These are queries you write without setting hard limits on the results. Rather, you let New Relic alerts machine learn your performance data, and then alert you when your data strays too far outside of your anomaly numbers.
To create a anomaly query, head over the the Alert console, go into Alert policies, and add a New alert policy. Then follow these steps:
Create alert policy. Give your policy a concise and descriptive name and select an Incident Preference. Then select Create alert policy.
Create a condition. Select NRQL

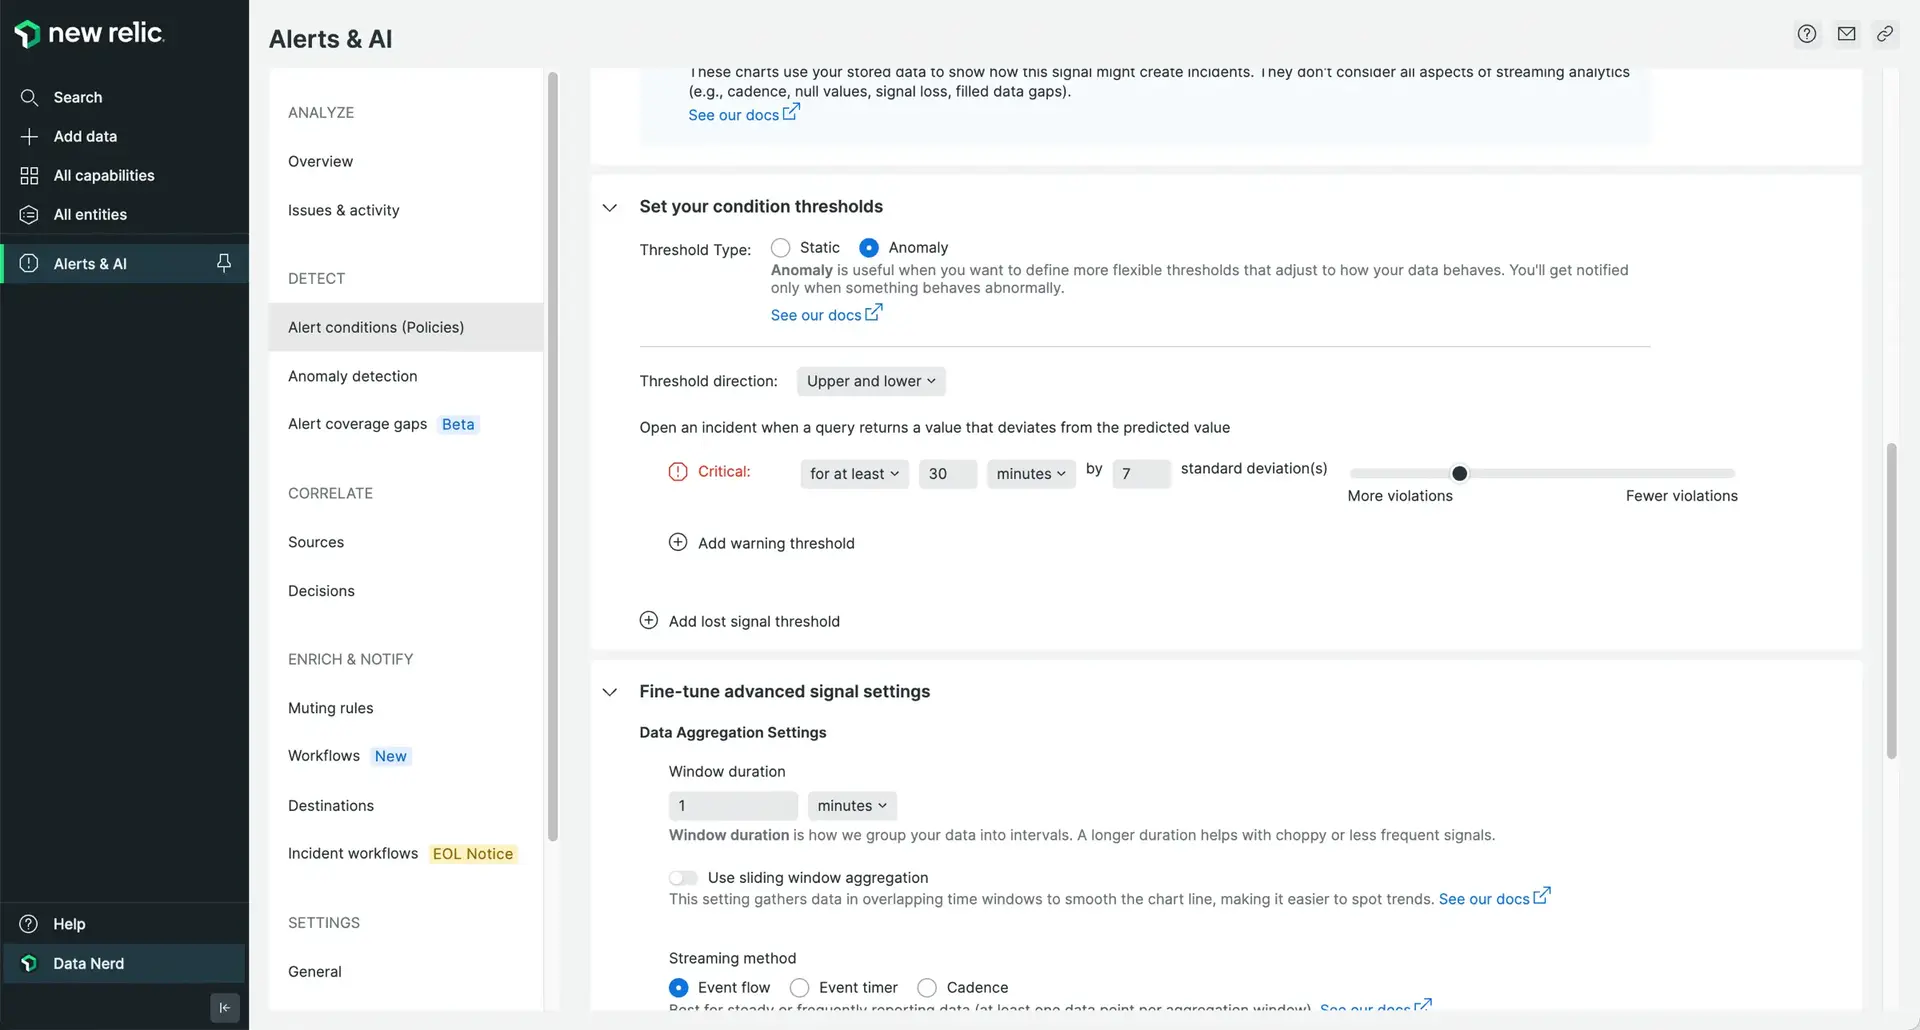
Define your query, and decide how restrictively New Relic alerts should analyze your data using a simple slider and visualization based on your recent performance.

The slider at the bottom of the chart either increases or decreases the gray band around your budget threshold (the blue line). The setting shown would have resulted in zero incidents based on recent data, and that is what you're looking for. However, if that blue line spikes up or down out of the gray band, we will immediately notify you.
Alerts provide a great way to help you proactively learn about your cloud spending or about any of your performance data.
Learn more
- Review the Proactive alerting and incident orchestration tutorial for a deeper dive on some of the best practices outlined above.